After posting the weather app tutorial , many friends asked me to do a tutorial about how to organize Android Views (TextView , ImageView …) inside a UI. So in this tutorial, we’ll find out how to make better UI.

Android UI is designed using XML files , thus, it’s based on tags. It’s recommended that you be familiar with XML.
LinearLayout VS RelativeLayout
Both LinearLayout and RelativeLayout , are containers that holds other Views like TextView , ImageView , Button …
The difference between them , is how they organize the items that it contains.
LinearLayout
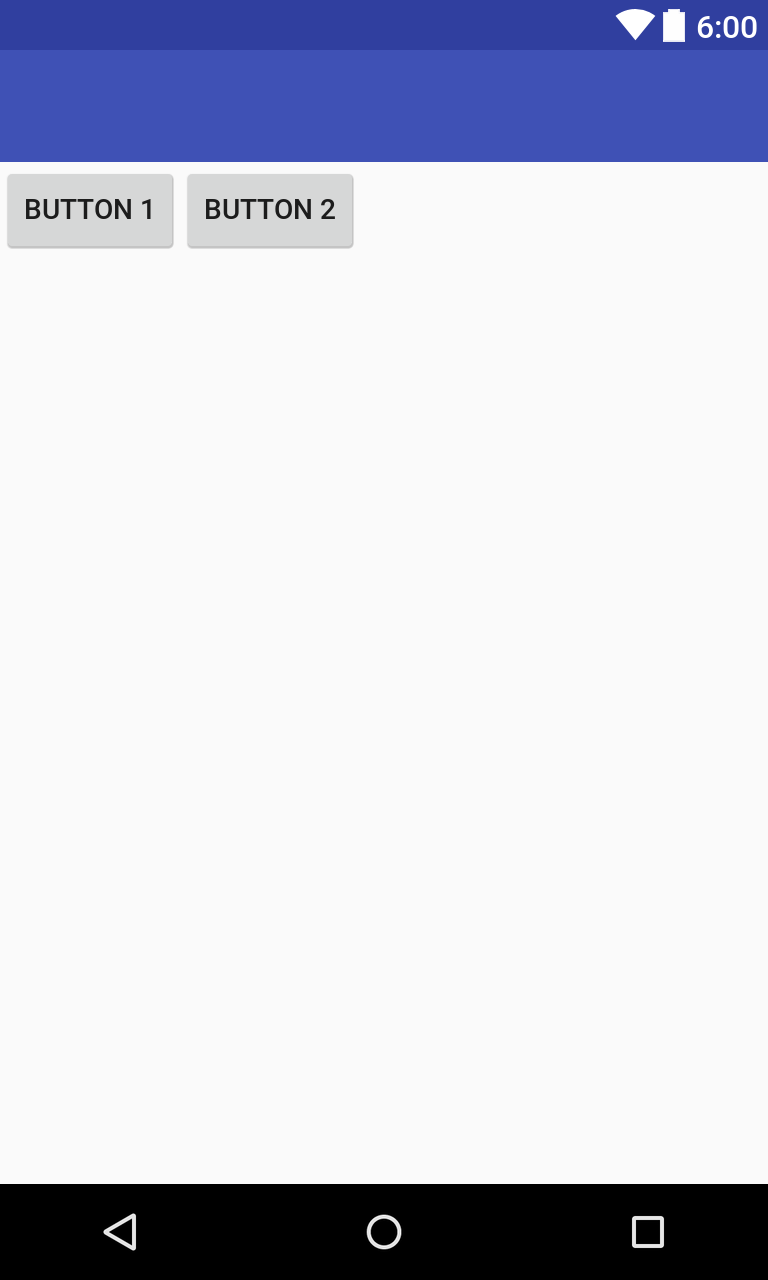
A LinearLayout organize Views either vertically or horizontally .
A LinearLayout with vertical orientation , put Views one below the other
<LinearLayout
    android:layout_width="match_parent"
    android:layout_height="match_parent"
    android:orientation="vertical"
    >

    <Button
        android:layout_width="wrap_content"
        android:layout_height="wrap_content"
        android:text="Button 1"
        />

    <Button
        android:layout_width="wrap_content"
        android:layout_height="wrap_content"
        android:text="Button 2"
        />

</LinearLayout>
The result would be

A LinearLayout with horizontal orientation put Views one next to the other
<LinearLayout
    android:layout_width="match_parent"
    android:layout_height="match_parent"
    android:orientation="horizontal"
    >

    <Button
        android:layout_width="wrap_content"
        android:layout_height="wrap_content"
        android:text="Button 1"
        />

    <Button
        android:layout_width="wrap_content"
        android:layout_height="wrap_content"
        android:text="Button 2"
        />

</LinearLayout>
The result would be
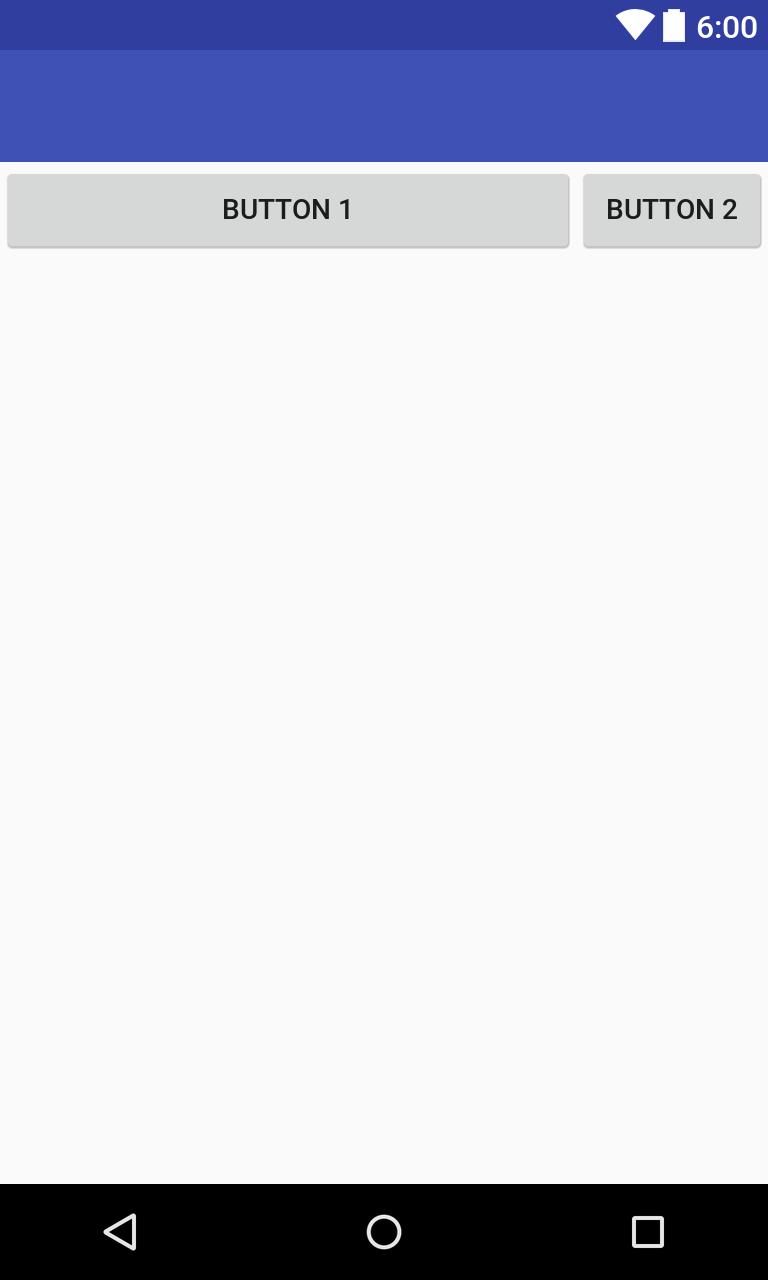
RelativeLayout
A RelativeLayout organize Views the one relative to the other. It’s hard to organize Views using a RelativeLayout .
<RelativeLayout
    android:layout_width="match_parent"
    android:layout_height="match_parent"
    >

    <Button
        android:layout_width="wrap_content"
        android:layout_height="wrap_content"
        android:text="Button 1"
        />

    <Button
        android:layout_width="wrap_content"
        android:layout_height="wrap_content"
        android:text="Button 2"
        />

</RelativeLayout>
The result would be
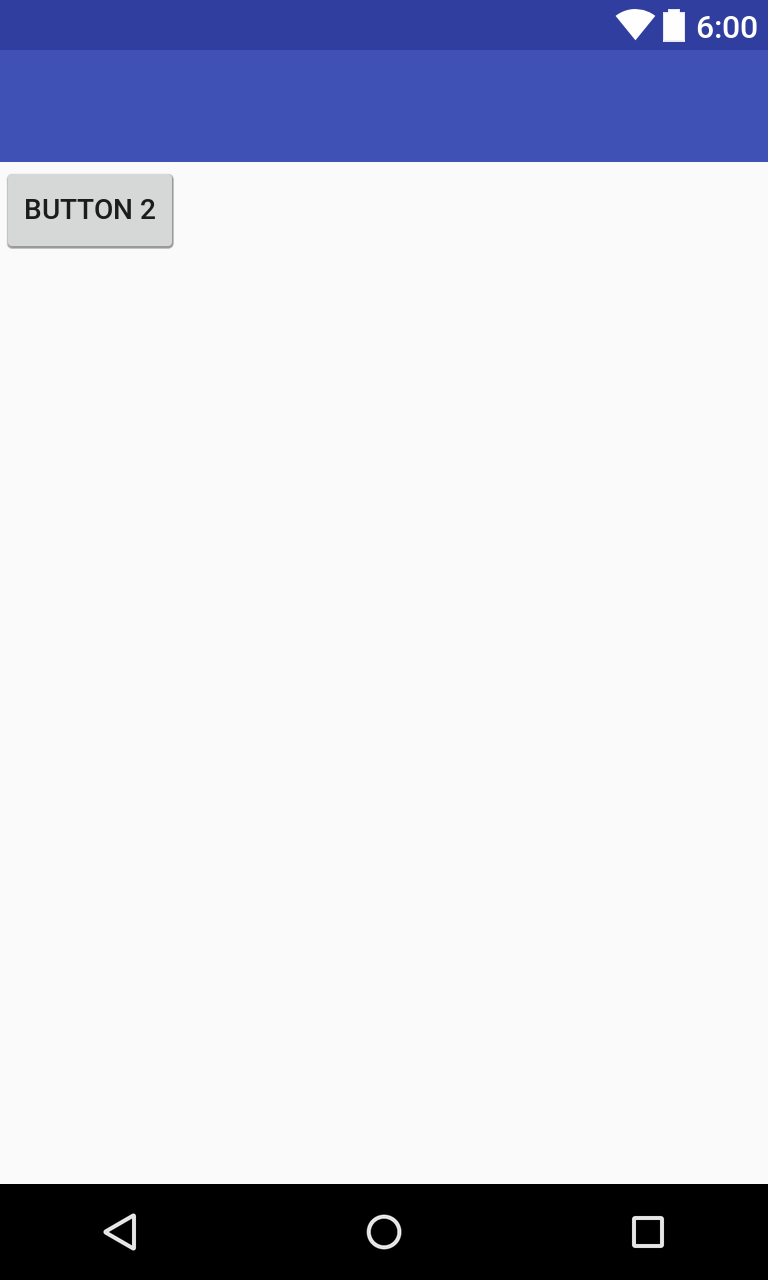
The first Button is hidden behind the second one. You see the difference between Relative and Linear . That being said , RelativeLayout is required if you want to put a View behind an other . One of the most popular use cases of RelativeLayout is putting an ImageView with a ProgressBar.
<RelativeLayout
    android:layout_width="match_parent"
    android:layout_height="match_parent"
    >

    <ImageView
        android:layout_width="wrap_content"
        android:layout_height="wrap_content"
        android:src="@mipmap/ic_launcher"
        />

    <ProgressBar
        android:layout_width="wrap_content"
        android:layout_height="wrap_content"
        />

</RelativeLayout>
The result would be
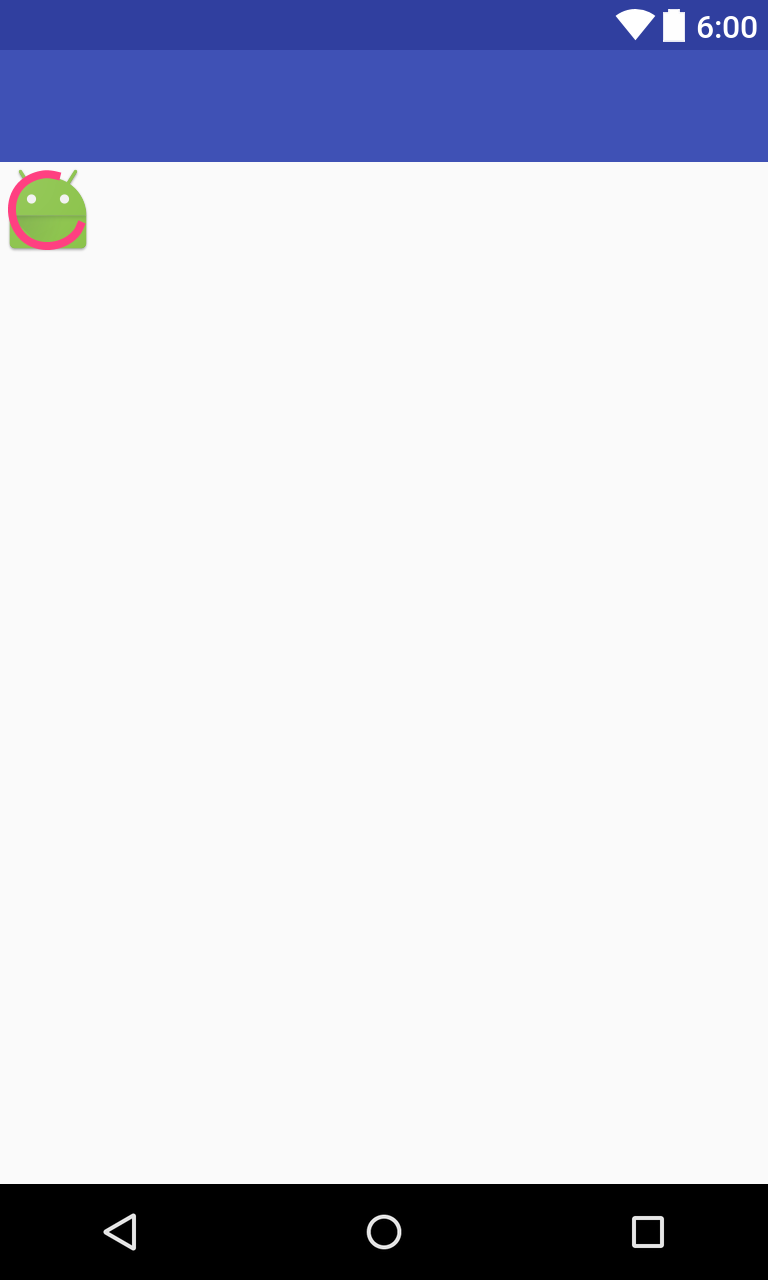
So , in your JAVA code , you’ll hide the ImageView and show the ProgressBar while loading the image . Once the image loaded , you hide the ProgressBar and show the ImageView.
ScrollView
If you have a long list of Views and the screen can’t display them all , put them in a LinearLayout and make the ScrollView as a parent . Let’s see an example
<ScrollView
    android:layout_width="match_parent"
    android:layout_height="match_parent">
<LinearLayout
    android:layout_width="match_parent"
    android:layout_height="match_parent"
    android:orientation="vertical"
    >

    <Button
        android:layout_width="wrap_content"
        android:layout_height="wrap_content"
        android:text="Button 1"
        />
    <ImageView
        android:layout_width="wrap_content"
        android:layout_height="wrap_content"
        android:src="@mipmap/ic_launcher"
        />

    <Button
        android:layout_width="wrap_content"
        android:layout_height="wrap_content"
        android:text="Button 2"
        />

</LinearLayout>
</ScrollView>
If you have more content to add , and the screen is too small to display it all , you’ll have a scroll bar and you can see all the UI by scrolling up and down.
match_parent VS wrap_content
Every graphical item should have 2 attributes :
- android:layout_width
- android:layout_height
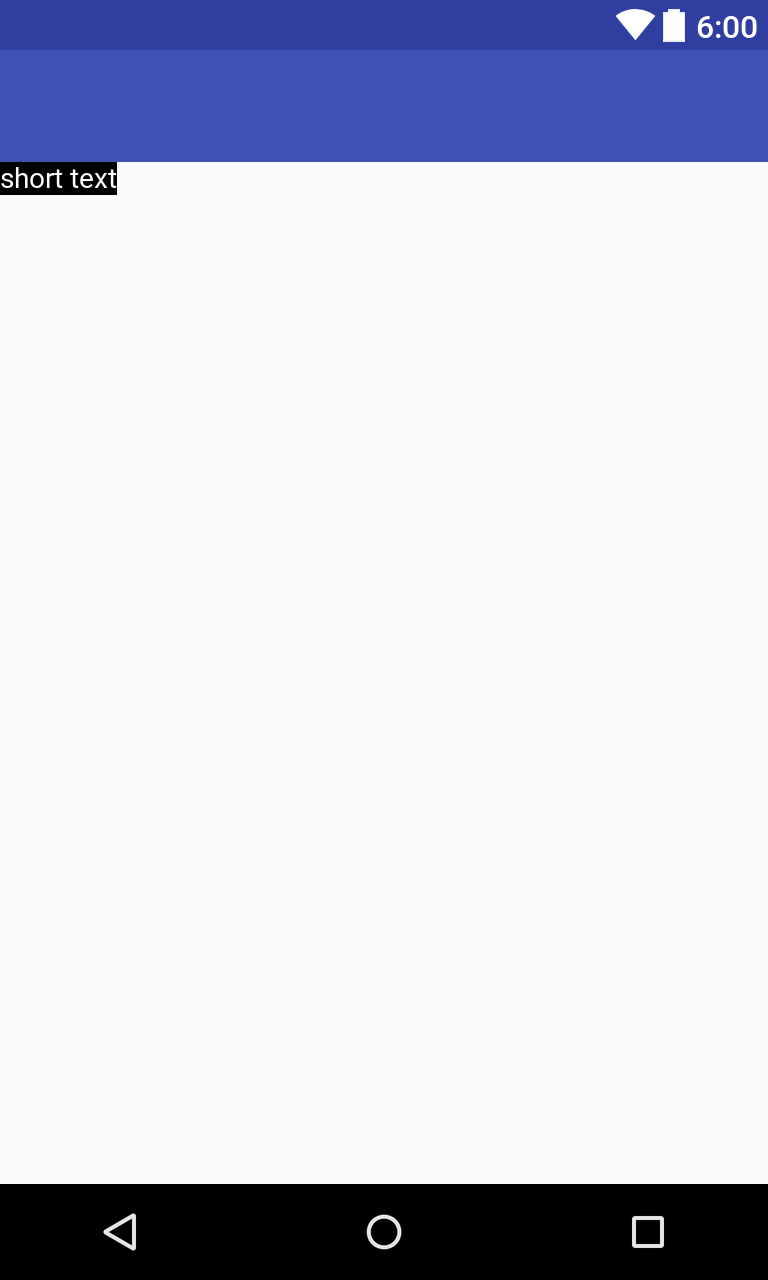
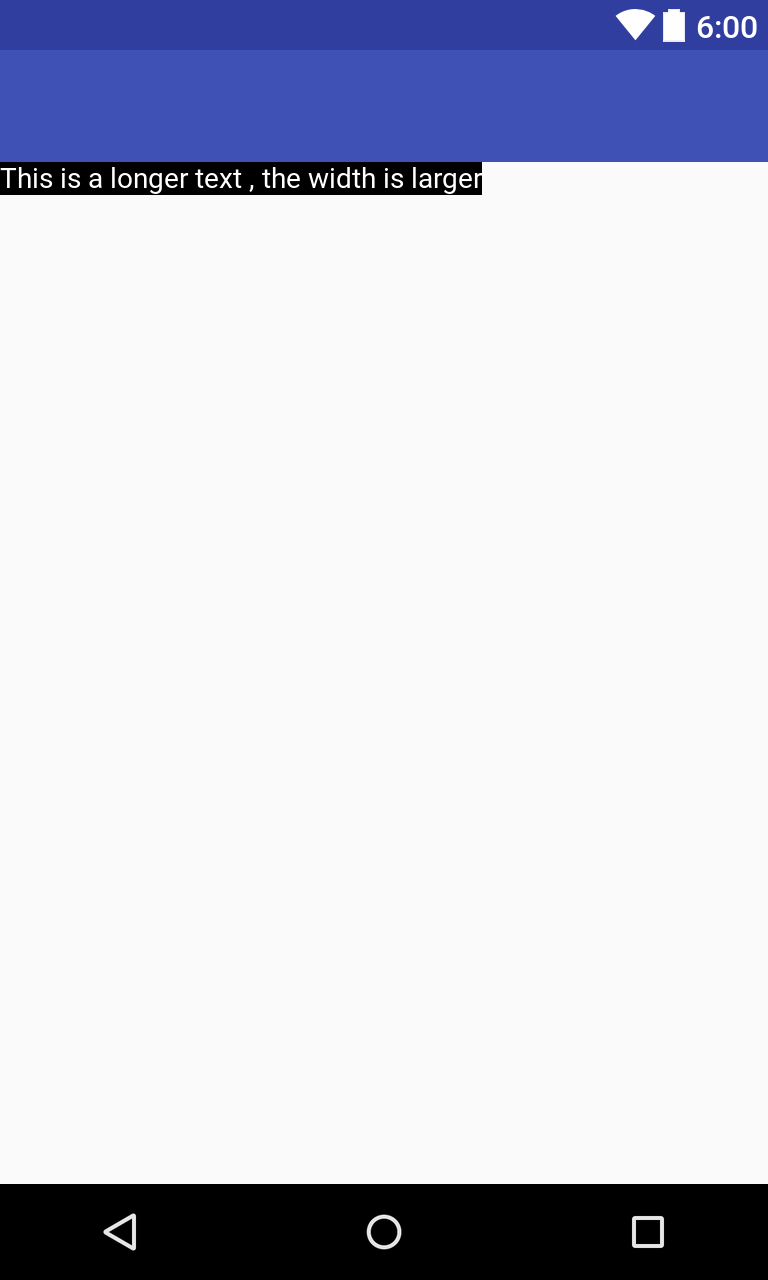
match_parent means that the View will have whole size as its parent container. wrap_content means that the View will take that size it needs. Let’s see what happens when we set the layout width of a TextView as wrap_content (I changed the text color and text background to better understand the difference)
<LinearLayout
    android:layout_width="match_parent"
    android:layout_height="match_parent"
    android:orientation="vertical"
    >

   <TextView
       android:layout_width="wrap_content"
       android:layout_height="wrap_content"
       android:text="short text"
       android:textColor="#FFFFFF"
       android:background="#000000"
       />

</LinearLayout>
The result would be
If we write a longer text , the result would be
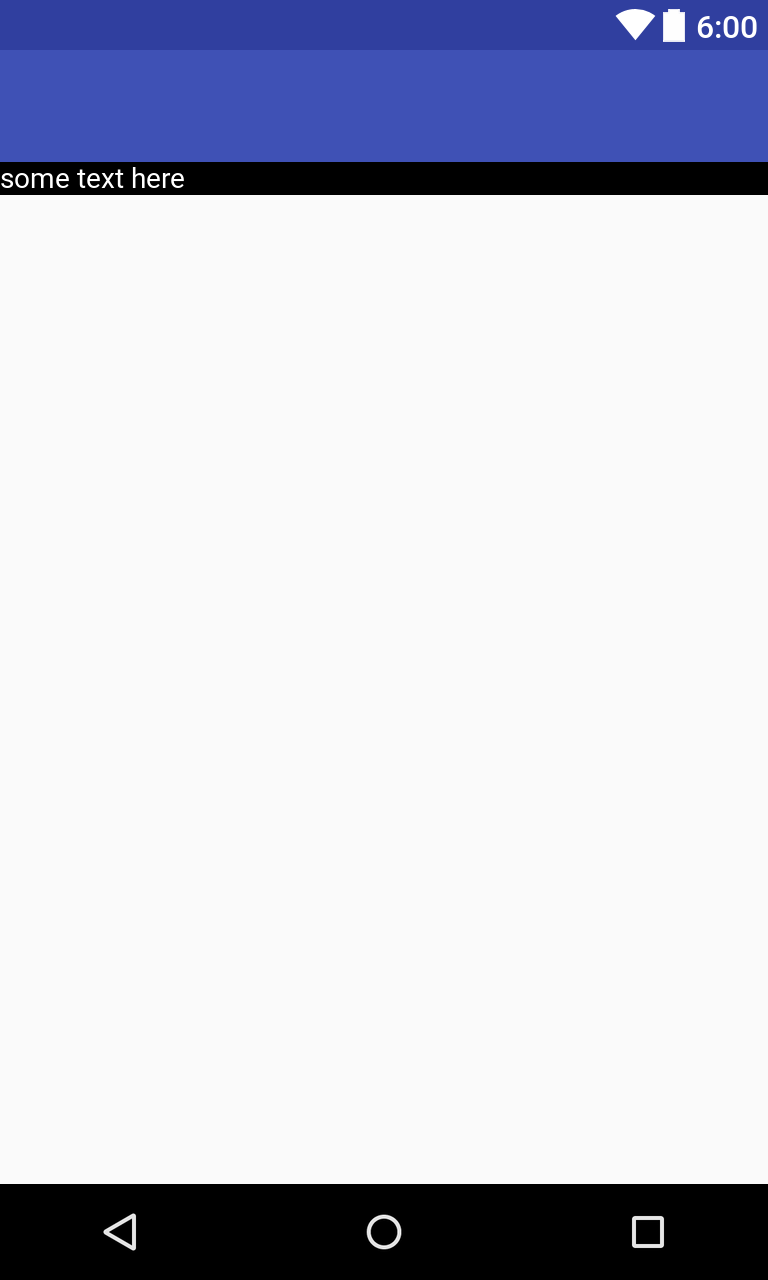
If we change the width to match_parent , it will take all the screen width since its parent container width is set to match_parent also.
<LinearLayout
    android:layout_width="match_parent"
    android:layout_height="match_parent"
    android:orientation="vertical"
    >

   <TextView
       android:layout_width="match_parent"
       android:layout_height="wrap_content"
       android:text="some text here"
       android:textColor="#FFFFFF"
       android:background="#000000"
       />

</LinearLayout>
The result is
layout_weight and weightSum
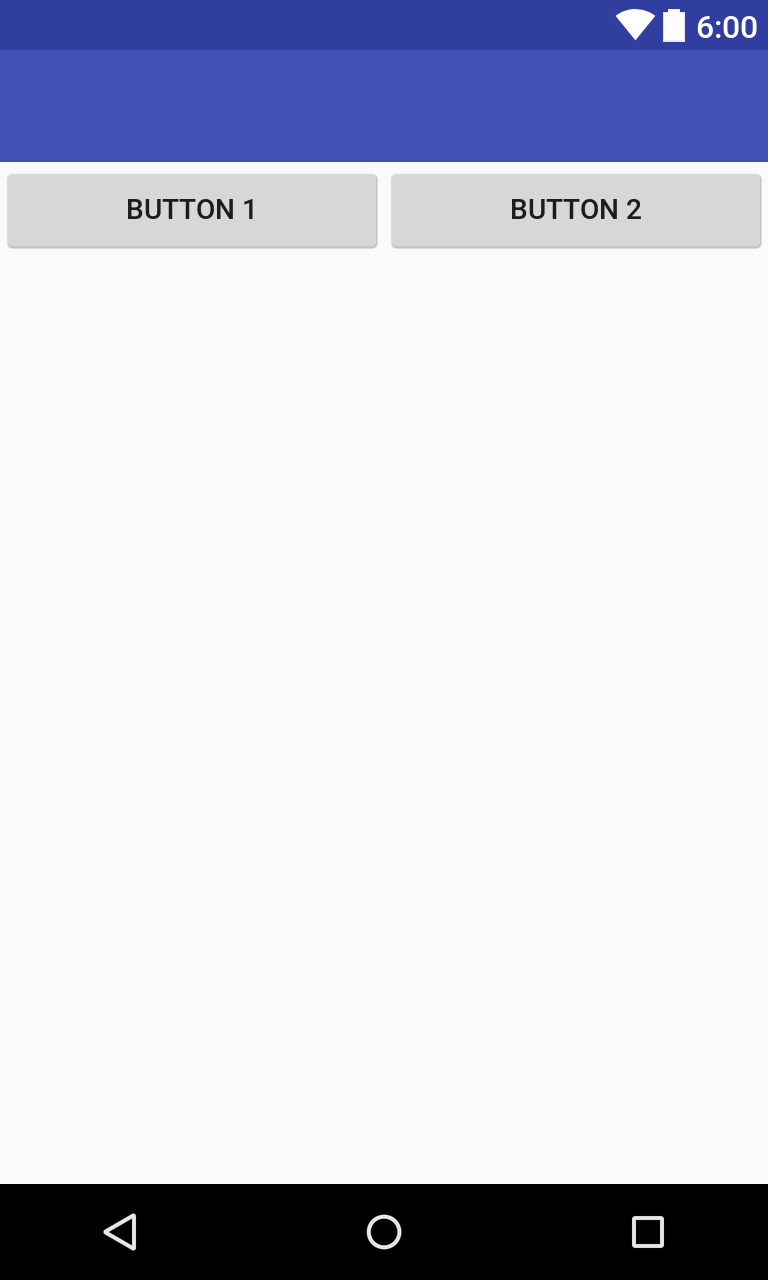
If you want to customize the parent container space distribution between the Views, you have to use layout_weight and weightSum. In the parent container , weightSum means that the space will be divided to “n” units. And in View tag , the layout_weight attribute means how much it’ll occupy from the “n” units (of its parent container) For example , if you have 2 Buttons and you want to distribute the space equally , set layout_weight (for both of them) to 1 and weightSum (of the parent container) to 2 . Make sure to set the layout_width to “0dp”
<LinearLayout
    android:layout_width="match_parent"
    android:layout_height="match_parent"
    android:orientation="horizontal"
    android:weightSum="2"
    >

  <Button
      android:layout_width="0dp"
      android:layout_height="wrap_content"
      android:layout_weight="1"
      android:text="Button 1"
      />
    <Button
        android:layout_width="0dp"
        android:layout_height="wrap_content"
        android:layout_weight="1"
        android:text="Button 2"
        />

</LinearLayout>
The result would be
In case you want to give the first Button 3/4 of the screen width , set the weightSum to 4 , the Button 1 layout_weight to 3 and the Button 2 layout_weight to 1.
<LinearLayout
    android:layout_width="match_parent"
    android:layout_height="match_parent"
    android:orientation="horizontal"
    android:weightSum="4"
    >

  <Button
      android:layout_width="0dp"
      android:layout_height="wrap_content"
      android:layout_weight="3"
      android:text="Button 1"
      />
    <Button
        android:layout_width="0dp"
        android:layout_height="wrap_content"
        android:layout_weight="1"
        android:text="Button 2"
        />

</LinearLayout>
The result would be
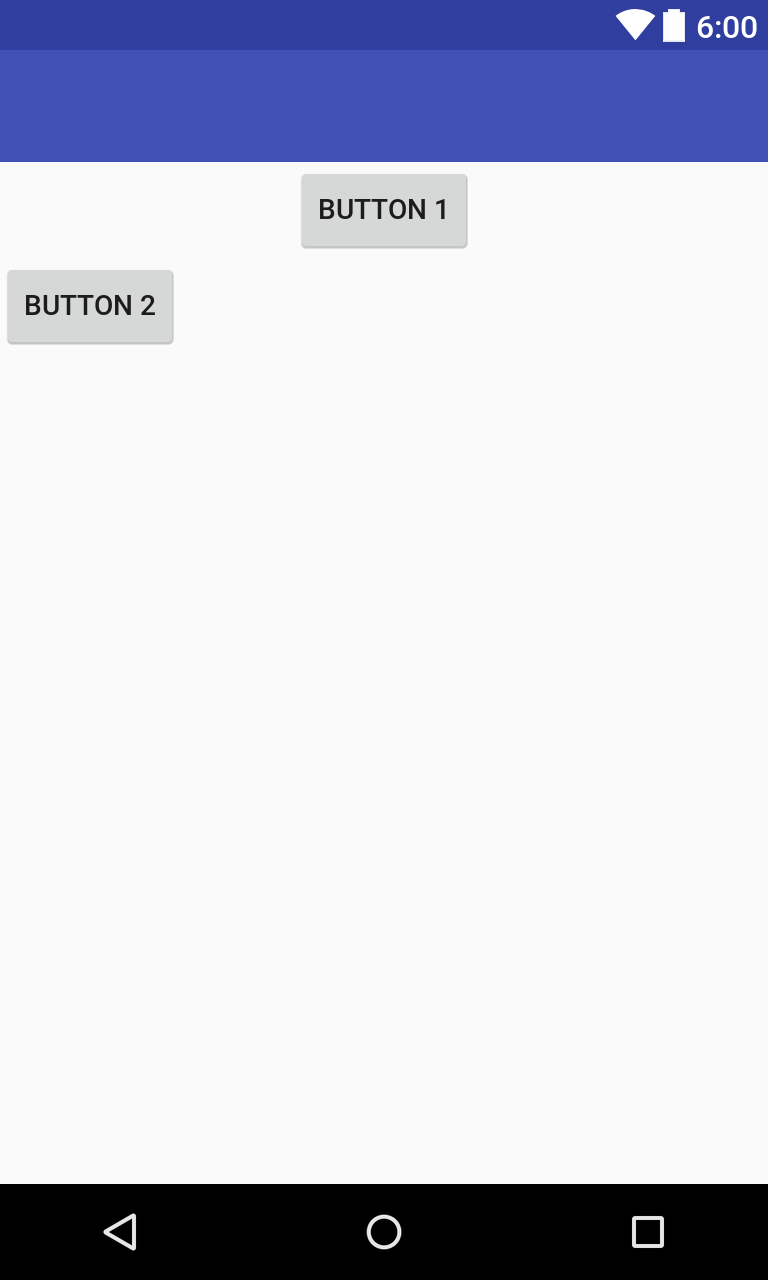
gravity VS layout_gravity
Both of those properties are used to position the Views properly.
- layout_gravity is used to position the View inside its parent container
- gravity is used to position the content of the View itself
This code will position the first Button in the center of the screen
<LinearLayout
    android:layout_width="match_parent"
    android:layout_height="match_parent"
    android:orientation="vertical"
    >

  <Button
      android:layout_width="wrap_content"
      android:layout_height="wrap_content"
      android:text="Button 1"
      android:layout_gravity="center"

      />
    <Button
        android:layout_width="wrap_content"
        android:layout_height="wrap_content"
        android:text="Button 2"
        />

</LinearLayout>
The result would be
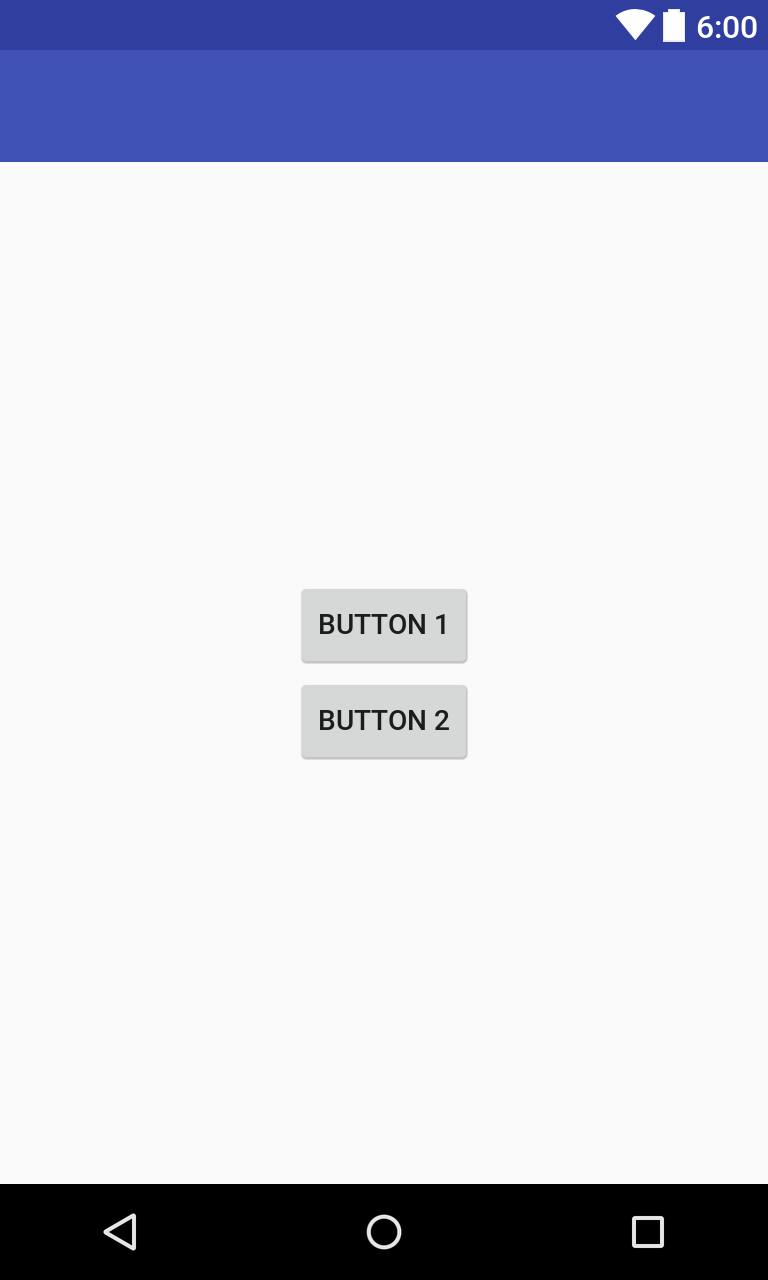
If you want to center both of them , set the gravity to center in the parent container (since gravity is used to position all the content inside a View)
<LinearLayout
    android:layout_width="match_parent"
    android:layout_height="match_parent"
    android:orientation="vertical"
    android:gravity="center"
    >

  <Button
      android:layout_width="wrap_content"
      android:layout_height="wrap_content"
      android:text="Button 1"

      />
    <Button
        android:layout_width="wrap_content"
        android:layout_height="wrap_content"
        android:text="Button 2"
        />

</LinearLayout>
The result would be
Test your skills
If you want to test your skills , try to develop this user interface. The solution is at the end of this tutorial. Launch Android Studio and consider it as an exam.
The solution is here.